How to Mount and Care for Staghorn Ferns: Complete Guide

Updated: 15 hours ago
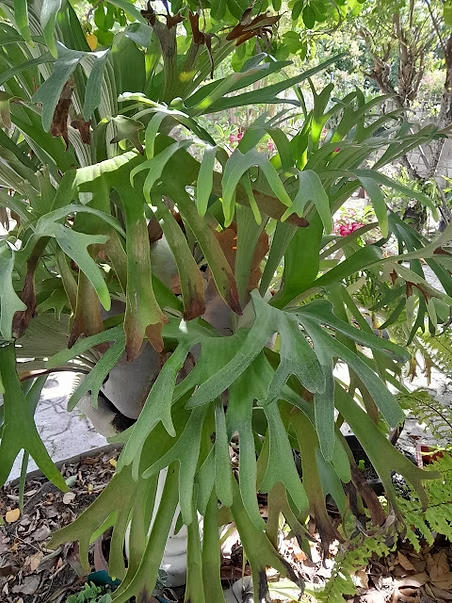
Mounting the Staghorn Fern: Living Art for Tropical Balconies
Few plants capture attention quite like the Staghorn Fern (Platycerium spp.). With fertile fronds shaped like majestic elk antlers and an extraordinary growth habit that completely defies the traditional "pot and soil" routine, this tropical epiphyte is a literal living sculpture.
In Jamaica and other warm Caribbean climates, staghorn ferns thrive beautifully outdoors in shaded, humid spots, but they can also be grown on porches, verandas, or indoors when mounted properly onto wooden boards.
1. Understanding the Plant's Anatomy
Because staghorn ferns are epiphytes (air plants), they naturally grow anchored to tree trunks or rocks in our tropical forests rather than down in the dirt. To succeed with them at home, you must understand their two entirely distinct frond types:
· Shield Fronds: These are the round, flat leaves at the base that clamp tightly onto the surface. They start green but naturally turn brown and papery as they mature. Do not remove brown shield fronds! They act like a built-in compost bin, trapping falling leaves and organic debris that slowly decay to feed the plant's root system.
· Fertile Fronds: These are the long, green, antler-shaped blades that shoot outward to handle photosynthesis and produce reproductive spores. This is what gives the plant its striking, dramatic look.
2. Light & Humidity Requirements
· The Sweet Spot: Staghorn ferns prefer bright, indirect, or dappled sunlight.
· Outdoors: They are perfectly content tucked beneath the breezy canopy of a backyard mango or breadfruit tree, or hanging on a shaded veranda wall.
· Indoors: Place them near an east- or north-facing window. Avoid harsh midday sunlight, which will instantly bleach and scorch the fronds.
· Humidity: They thrive best in 60–80% humidity. Our natural Jamaican island air makes outdoor cultivation effortless. If you keep one inside a room with dry air conditioning, you will need to mist the fertile fronds regularly or group it closely alongside other potted plants to raise the local moisture levels.
3. The Soak & Mist Watering Routine
Watering is the most unique part of staghorn care because they lack soil to lock in moisture.
· The Soak Method (Once a Week): Take the entire mounted board down from the wall and submerge the mossy root base into a tub or bucket of water for 10 to 20 minutes. Let it drip dry before hanging it back up.
· The Local Misting Trick: During hot, breezy dry spells in July and August, mist the green fertile fronds with a spray bottle every few days to keep them hydrated.
· Signs of Trouble: If the green antler tips begin to wilt or turn brown, the fern is underwatered. If the flat shield fronds turn black or look mushy, it is overwatered and starting to rot from poor airflow.
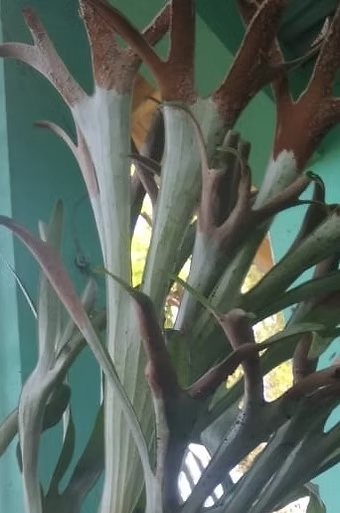
4. How to Mount Your Fern on Wood
Mounting your fern is a wonderful weekend project, mounting is part of the fun. Traditionally, staghorn ferns are mounted on wooden boards, tree trunks, or hanging baskets.
1. The Base: Source a piece of untreated, rot-resistant local wood (like cedar or a sturdy log slab).
2. The Nest: Place a generous handful of damp, water-soaked sphagnum moss right in the center of the board to act as a soft moisture cushion for the roots.
3. The Tie-Down: Position the flat shield fronds over the moss, and wrap jute twine, fishing line, or soft reusable green plant ties across the base, securing them to screws on the side of the board.
Over the next few months, new green shield fronds will naturally grow directly over the twine and lock themselves onto the wood forever, creating a seamless, organic mount.
5. Organic Feeding & Propagation
Because these ferns don't have soil nutrients, they rely entirely on external feeding:
· The Local Banana Peel Trick: Tuck a small piece of ripe banana peel or a handful of organic compost directly behind the top edge of the brown shield fronds. As it rains or when you water, the decomposing nutrients melt straight into the roots for a slow-release organic boost!
· Liquid Feeding: Alternatively, spray the root base monthly with highly diluted liquid fish emulsion or a balanced organic fertilizer early in the morning.
· Dividing "Pups": As your staghorn matures, it will produce tiny baby clones called "pups" along the sides. Simply slide a sharp knife between the wood and the pup, gently separating its small root base from the mother, and tie it onto a brand-new mounting board!
6. Tropical Troubleshooting: Quick Problems & Solutions
The Problem: Scale Insects & Mealybugs
· The Fix: Warm weather can bring tiny, sap-sucking scale bugs that hide underneath the antler fronds. Dip a cotton swab into rubbing alcohol and dab them off manually to keep your foliage clean without harsh chemicals.
The Problem: Shield Rot During Rainy Seasons
· The Fix: Heavy, continuous October downpours can oversaturate outdoor mounted boards. If the weather stays waterlogged for consecutive days, move your hanging boards to a spot with a roof or an open veranda ceiling to let the moss breathe and dry out between storms.
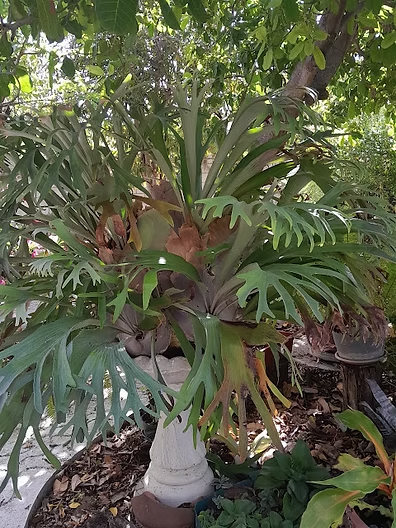
Closing Thoughts
Staghorn ferns are not difficult once you step away from the standard "potted plant" mindset and treat them like magnificent pieces of mounted art. Whether mounted elegantly onto a backyard tree trunk or displayed proudly as a living wall feature on a shaded veranda, they adapt beautifully to our environment and become a gorgeous reflection of tropical resilience.
Until next time — keep your hands in the soil, your heart light, and let joy grow.
With love from Hopey’s Garden
Comments