Your Backyard, Your Fresh Start: The 30-Day Tropical Kitchen Garden Plan

Updated: 15 hours ago

Transforming an empty patio, veranda, or concrete backyard into a food-producing paradise is one of the most rewarding things you can do in Jamaica. You don’t need an acre of land to grow an abundance of fresh food. In fact, container gardening is the ultimate space hack for our climate—allowing you to control your drainage during heavy rains and protect your crops from the intense afternoon heat.
Whether you want to harvest sweet corn, crisp bok choy, or fresh escallion right outside your door, this 30-Day program combines the perfect container setups with a day-by-day roadmap to guarantee your fresh start.

Master Checklist: Choosing Your Tropical Containers
Before you plant a single seed, you need the right homes for your crops. In our hot climate, container choices require strategic decisions:
Avoid Treated Wood: Chemicals from treated lumber can leach directly into your edible veggies. Stick to untreated cedar, food-grade 5-gallon buckets, or thick fabric grow bags.
The Color Warning: Avoid dark-colored or black pots. Dark colors absorb the intense tropical heat, baking the soil and frying delicate root systems. Stick to light-colored, clay-colored, or white containers.
Elevate for Airflow: Always place your pots on top of bricks or stones. Elevating them off the hot concrete veranda improves drainage and allows breezy airflow beneath the root systems.
The 10-Inch Rule: While shallow greens can manage smaller pots, your containers should generally be at least 10 inches wide and deep. Larger pots hold more soil, which means they retain moisture longer and save you from watering three times a day!
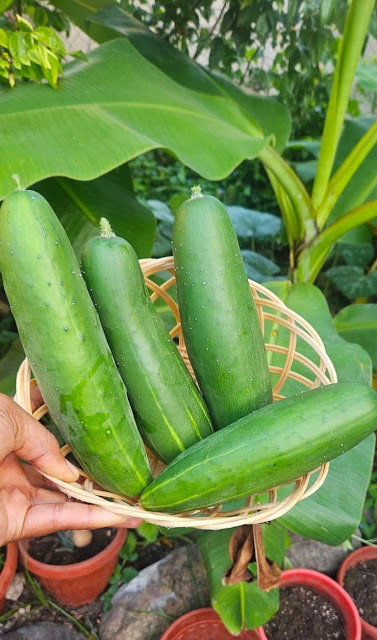
Add Support Early: Vining crops like cucumbers or tomatoes will yield double if given structural support. Place a simple wire tomato cage inside the pot at the exact time of planting so you don't disturb the roots later.
The 30-Day Daily Fresh Start Matrix

WEEK 1: The Foundation & Soil Setup
Goal: Building a High-Drainage Root Environment
Day 1: Pick a location that receives 6+ hours of morning sun but offers light afternoon relief.
Day 2: Clean your containers thoroughly and drill extra drainage holes in the bottom if needed.
Day 3: Lay down a half-inch layer of coarse gravel or small stones at the bottom of each pot to prevent waterlogging.
Day 4: Buy your Pro-Mix, organic compost, and sharp sand at the farm store.
Day 5: Mix your soil: Combine 70% potting mix/compost with 30% sharp sand to create the ultimate loose, free-draining tropical blend.
Day 6: Fill your containers up until the soil sits 2 to 3 inches below the rim (this gives you room to water deeply without overflow).
Day 7: Give your filled containers a gentle pre-watering soak to let the soil settle
.

WEEK 2: The Sowing & Starter Phase
Goal: Sowing Smart to Beat the Heat
Day 8: Map out your crops. Plan for one cabbage plant per 5-gallon container, two cucumber plants per 5-gallon pot, and rows spaced 3 inches apart for deep carrots.
Day 9: Pre-moisten your seedling trays or small starter pots using a misting bottle so seeds aren't washed away.
Day 10: Sow your Scotch Bonnet pepper, cabbage, and Sweet Corn seeds into trays; place them in a safe, shaded outdoor area like a back porch or shed.
Day 11Visit the market to buy fresh escallion and thyme. When selecting your thyme, look for bundles with tiny root balls. Next, cut off the escallion tops and reserve them for cooking, then set the stubs aside for planting!
Day 12: Directly push your escallion stubs straight into their final pots (no pre-rooting in water required—they will sprout in 3 days!).
Day 13: Plant your market thyme slips—the ones with root balls—into a pot kept in a bright, shaded area until they take root. Alternatively, you can cut a three-inch snippet from the very top of a healthy stem. Apply rooting hormone to the exposed portion of the stem and plant it in a well-draining potting mix; you will see new roots emerge in about six weeks.
Day 14: Mist your porch seedling trays daily to keep the soil evenly damp but never soggy.

" The great Transition- Young Plants Thriving"
WEEK 3: The Great Transition
Goal: Hardening and Moving Outside
Day 15: Celebrate your direct-sown escallions shooting up their first strong green leaves!
Day 16: Look for the first green seedling pops showing up in your porch trays.
Day 17: Check your shaded thyme pots for the very first signs of new, bright green leaf growth.
Day 18: Move your newly rooted thyme pots out into the permanent, sunny area of your garden.
Day 19: Expose your porch pepper and corn seedlings to direct morning sunlight for exactly 2 hours, then return to shade.
Day 20: Increase outdoor seedling sun exposure to 4 hours to harden them up against the tropical heat.
Day 21: Permanently transplant your hardy seedlings into their large containers and establish your strict 6:00 AM daily watering routine.

" Mulch Layer: Guarding Moisture and Soil Health"
WEEK 4: Management & Defense
Goal: Protection and Maintenance
Day 22: Gather local mulch, such as clean, dry grass clippings or leaf mold.
Day 23: Spread a thick layer of mulch over the bare soil in every pot to stop water evaporation.
Day 24: Push your finger an inch into the soil of your pots daily. Potted soil dries out fast—if it feels dry, water deeply at the base.
Day 25: Inspect leaf folds and whorls for thrips, aphids, or worms.
Day 26: Mix 1 tablespoon of organic Neem oil with a few drops of mild dish soap in a spray bottle of water for a safe evening pest shield.
Day 27: Gently prune away any yellowing or damaged lower leaves to maximize airflow.
Days 28–30: Top-dress pots with a handful of fresh compost, snap your progress photos, and enjoy your living veranda grocery!
Why This 30-Day Approach Works in Our Climate
Taking small, intentional steps prevents you from getting overwhelmed by the tropical midday heat or buying the wrong supplies all at once. By following this grid, you are building sustainable habits that match the unique weather patterns, soil needs, and pest challenges of an island backyard.


Comments